
If you have spent years relying on flat irons, curling wands, and high-heat blowouts, you might be noticing the unfortunate side effects: brittle strands, excessive frizz, and split ends that seem to travel up the hair shaft. Finding reliable, science-backed solutions is crucial when you realize your locks have lost their natural elasticity and shine. This article serves as The Complete Guide to Repairing Heat-Damaged Hair at Home, walking you through the exact steps, ingredients, and routine changes required to nurse your hair back to health without needing to visit a salon every week.
Understanding What Heat Damage Actually Is
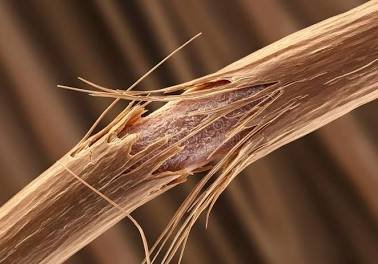
Before you can fix the problem, it helps to understand what happens when you expose your hair to temperatures exceeding 300°F (150°C). Hair is primarily made of a protein called keratin, held together by various types of chemical bonds (disulfide, hydrogen, and salt bonds).
When extreme heat is applied repeatedly without adequate protection, it strips the hair of its natural moisture, cracks the outer protective layer (the cuticle), and breaks down those essential internal protein bonds. The result is hair that looks dull, feels like straw, and snaps easily under tension.
Common signs of heat damage include:
- Loss of Elasticity: If you gently pull a wet strand of hair and it snaps instead of stretching and bouncing back, it lacks moisture and protein.
- Excessive Shedding and Breakage: Finding short, broken pieces of hair on your clothes or bathroom counter.
- Changed Texture: Straight hair may become inexplicably frizzy, while curly hair may lose its curl pattern, resulting in limp, stringy pieces.
- White Nodules: Tiny white dots at the ends of your hair, which indicate where the hair shaft has fractured.
Step 1: The Inevitable Trim
There is a hard truth in haircare: once a hair strand is split or heavily fractured, it cannot be permanently glued back together. While serums and oils can temporarily smooth the cuticle to make split ends look better, the structural damage is permanent.
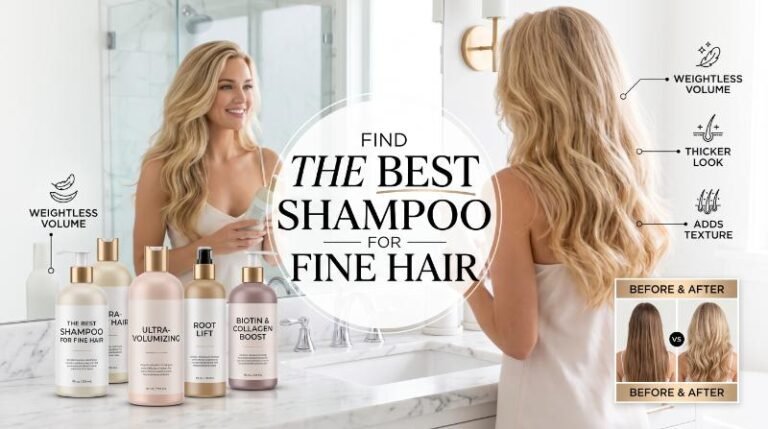
Choosing the right base product is essential for volume, so make sure to check out our top picks for The Best Shampoo for Fine Hair before styling.
If you want to stop the damage from traveling further up the hair shaft, you must cut it off. You have two options depending on your comfort level:
- The Big Chop: Cutting off all the damaged hair at once. This is the fastest way to start fresh with healthy hair, though it requires a significant length sacrifice.
- Micro-Trimming (Dusting): Trimming a quarter to a half-inch of hair every 4 to 6 weeks. This allows you to retain length while slowly phasing out the damaged ends.
Step 2: Rebuilding Bonds with Structural Treatments
Because heat permanently alters the protein structure of your hair, you need treatments that work on a molecular level rather than just coating the outside with silicones.
Bond-building treatments have revolutionized at-home hair repair. These products use patented active ingredients (like Bis-Aminopropyl Diglycol Dimaleate) to seek out broken disulfide bonds in the hair and link them back together.
How to use bond builders effectively:
- Apply the treatment to damp, unwashed hair.
- Leave it on for a minimum of 10-30 minutes (check your specific product’s instructions, but longer is generally better for severe damage).
- Follow up with a gentle shampoo and a hydrating conditioner.
- Use once a week for moderate damage, or two to three times a week for severely compromised hair.
In addition to bond builders, incorporating a protein mask once or twice a month can help fill in the gaps in the hair cuticle. Look for ingredients like hydrolyzed keratin, silk protein, or wheat protein. However, be careful not to overdo it—too much protein can make hair rigid and more prone to snapping.
Step 3: Intense Hydration and Moisture
Once you have addressed the structural integrity of the hair, you must replenish the moisture that high-heat styling tools boiled away. Heat-damaged hair is highly porous, meaning it absorbs moisture quickly but loses it just as fast.
If you are rushing out the door but still want to look effortlessly put-together, be sure to browse our favorite Easy 10-Minute Hairstyles.
To combat this, you need a robust hydration routine:
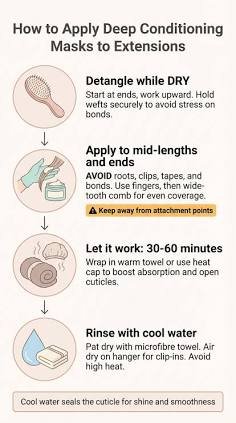
- Deep Conditioning Masks: Swap your regular conditioner for a rich, thick deep conditioning mask at least once a week. Look for hydrating ingredients like aloe vera, glycerin, shea butter, and hyaluronic acid.
- The LOC Method: To keep moisture locked into the hair cuticle after washing, use the Liquid, Oil, Cream (LOC) method. Apply a water-based leave-in conditioner (Liquid), seal it with a lightweight oil like argan or jojoba (Oil), and finish with a heavier styling cream (Cream) to lock everything in.
- Cool Water Rinses: Hot water lifts the hair cuticle, allowing moisture to escape. Rinse your conditioner out with cool water to help seal the cuticle down, locking in hydration and enhancing shine.
Step 4: Changing Your Styling Habits
All the treatments in the world will not help if you continue to fry your hair daily. Transitioning to heatless styling is non-negotiable during the repair phase.
Alternatives to hot tools:
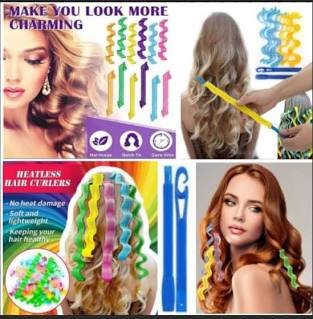
- Heatless Curls: Use silk rods, flexi-rods, or even the viral “robe tie” method overnight to achieve voluminous curls without a drop of heat.
- Air-Drying with Technique: Instead of rough-drying with a terrycloth towel, gently squeeze excess water out with a microfiber towel or an old cotton t-shirt to prevent cuticle friction. Apply a smoothing cream and let it air dry.
- Protective Styles: Braids, loose buns, and twists keep the ends of your hair tucked away and protected from environmental damage and friction.
If you absolutely must use heat for a special occasion, prep the hair correctly. Always use a high-quality heat protectant spray that guards up to 450°F. Ensure your hair is 100% dry before letting a flat iron or curling wand touch it—applying hot metal to damp hair literally boils the water inside the hair shaft, causing explosive damage to the cuticle. Keep the temperature on your tool below 350°F, and never do more than one pass on the same section of hair.
Repairing heat-damaged hair is not an overnight fix; it is a marathon of consistency, patience, and gentle handling. By prioritizing bond repair, deep hydration, and heatless styling, you will gradually restore your hair’s natural strength and vitality.
Once your makeup routine is flawless, head over to our Haircare & Styling section to find the perfect updo to complete your look.


One Comment